Monday, October 4, 2010

Mummy Treat Holders

I bought these pre-made wedding favor boxes from the dollar store about a year ago to use as mini Easter baskets but didn't get around to making them. I inked the edges of torn white scrapbook paper....but you can use crepe paper, tissue paper, gauze, ...anything to get the 'mummy' effect. I then added wiggly eyes, some ribbon, a spider, and moss as a filler on the inside. Then just fill with candy....or Halloween goodies. Try making these to look like pumpkins, Frankenstein, bats, or a witch.....anything goes!!!


I am linking up with the following link parties.....go check out the great ideas!!


Decorating on a Dollar

I decided to do a FALL arrangement on my mantel this year....instead of the usual pumpkins and scarecrows that I do every year. I was checking out my favorite blogs as usual...and on Becky Higgins blog...she had showed an assortment of glass vases with various items. I loved this look....though I didn't have alot of money to spend. I started with the Dollar Tree....years ago...I would have turned my nose up at some of the decorations that they offered....because they really did look like they cost a dollar....but over the years the selection and quality has gotten so much better. All the vases, flowers, mini pumpkins and gourds, the pumpkin topiary, candles and holders...all came from Dollar Tree. The pine cones (DT carries these too)...I got from Goodwill....still a dollar. The green beads....and the branches with orange balls...came from Hobby Lobby....with a coupon or 50% off sale. This total arrangement was less than 10 dollars....I placed it in the center of the mantel..and added pictures of my kids on both sides...its the first thing everyone notices as they walk into the room. My goal was to use items that would easily be changed from FALL to CHRISTMAS....so that I wasn't spending more money in a few months. I will change out the flowers, ....add ornaments to the vase instead of the gourds....and add a Santa where the pumpkin topiary is....now I am ready for Christmas!!! I am not going to have to spend a dime more...because these are things I already have!! Thanks for looking....I hope you get some inspiration for your fall decorating!!


the colors are so vibrant...I had to turn on a light to get a clear shot...but there are lots of lime green and orange here.....


Pumpkin topiaries are a big hit this year....so I decided to try my hand at one. I purchased these 3 from the DT...I pulled out the stems on the bottom two, added some moss....to complete the look. I had intended on adding some nice fall leaves on top...but couldnt find any to my liking without spending wayy to much....so I will wait till after the season ends...and hopefully pick up some for next year. BTW...I did not hot glue mine...because they sat on top of each other without it...but you may have to hot glue if your pumpkins don't have a flat top!!


I am linking up over at Eighteen25's and CraftOManiac's link party....go check them out!!

Saturday, September 18, 2010

Flowers, Flowers, Flowers

My days and nights are mixed up...so I have been spening alot of time on the internet looking at home decor how-to's....and I ran across some really cute flowers that are super easy....and FAST to make.

1. This one...is made from cutting 8-10 (or more if you like)...scalloped circles from your paper of choice. They have many paper punches that offer a nice scalloped edge. Then you place a brad in the center...and then just pull up each 'layer'......until you get your desired look. I bent a few edges of mine too....but this is optional. You can even ink the edges right before you start pulling up the layers.....this makes a really cool effect too. I made some of these with KK...so she could use them on her scrapbook pages....I can't wait to see what she comes up with.

(The purple is made out of regular tissue paper.....the other is made out of scraps of scrapbook paper....but you could use...newspaper, pages from a book, notebook paper....anything....but I found that the thinner the paper...the easier it is to shape into the flower!!)


2. This is a POM POM...they are very popular when it comes to parties....did you know that? Well I didn't and I am in love. They are fairly easy to make. You take 8 sheets of tissue paper...general size is 20x30....line them up on top of one another and fold back and forth like a fan..... Then you tie the center with wire. Next you can round the edges....or cut them in a spike shape...(I rounded)....then just fan out the tissue paper.....it turns into a ball. I made 2 different sizes....but just cutting the tissue paper in half....so my size was 20x15.....HAVE FUN!!!

Saturday, September 11, 2010

A Mini Book

This is a new little mini book that I made a few years back at a make-n-take at Scrapfest. When I was moving and cleaning out boxes...I ran across it. I have so many ideas for this little mini book....I have decided to make this mini book about 'My Top 5 Favorites"....of course not counting my kids....I will have to do another book about them later... :) These 'things' will consists of my obsessions or weaknesses...as I like to call them!! I will post my completed book soon...this will be my project to complete while I am off the later part of next week!!


(p.s. I will post measurements and a 'how to' over the next few days too)


Friday, August 27, 2010

...another option...

Ok so I really like all the colors....but I want the room to have more of a girlie appeal...so I took out the blue...added a little purple.....

Monday, August 23, 2010

A Sneak Peak

I am currently in the process of turning the extra room into my scrap room...and getting my bedroom back to...well a bedroom...LOL
I decided to go with bright colors....lots of choices out there with Back to School stuff at Target and Walmart......
Its still a work in process....but here's a peak.....

Wednesday, May 26, 2010

Teacher's Gifts

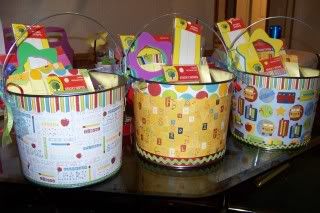
Well the end of the school year is here once again......this year I decided to make teacher buckets with supplies in them that the teacher could use....and also the bucket can be used later too!!

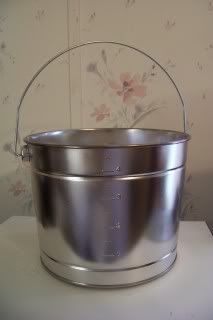
This is the bucket....before I decorated it!

Photobucket

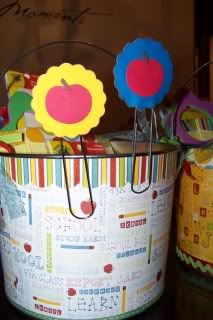
This is the finished product......I ususally do paint cans but this was a nice change....the only down side was that the top and bottom are different sizes....so the paper had to be manipulated a little bit....so for the bottom I added ribbon to cover the 'manipulation' as stated above....but all in all once I did the first.....the next two went by fast.....matching the paper took longer than putting everything on the bucket!! I used modge podge....as my adhesive.....except for the ribbon...and my xyron took care of that!!

Photobucket

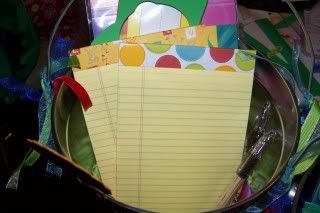
These are store bought tablets that I added paper to the top to add a little flair.....simple...but makes a BIG statement!!

Photobucket

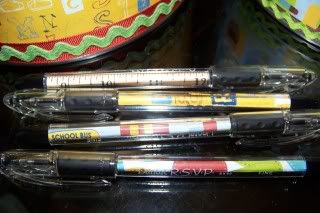
These are regular black hollowed barrel pens.....I cut matching scrapbook paper...and inserted it into the barrel before adding the ink....and whaaaala......a nice coordinating addition!!

Photobucket

These large paper clips can be bought at Wal-Mart.....I used my QK apple...and my QK scalloped circle/flower to accent them. I was going to put graded and not graded on the apples....but thought they looked good just as they were. These are my fav's because now the teacher will have something cheerful to look at while grading ALL those papers....LOL!!

Photobucket

The last little goodie....was a door hanger from the kids.....I used my Quickutz 4x8 alphabets Chemistry and Supermarket...and cut out foam letters to add the teacher's names...and the kids pick out ribbon, sticker, and buttons to decorate!! These tuned out soo cute...and come to find out...all the teachers needed them....because the back doors to the classrooms are being changed to one solid color....so the kids won't be able to tell the difference between the classrooms....so each teacher can hang these outside...and the kids will know exactly which door is their teacher!!! Love it when things work out like this!!!!

Photobucket