We made these little snowmen out of regular crew socks. Each has its own personality :) There was no sewing involved. I got the idea from this blog. Our cub scout pack made these with some resident at a local nursing home...and we will be making them at our Christmas party next week!!
Saturday, December 14, 2013
Monday, September 2, 2013
S.W.A.P.S.
SWAPS stands for...."Special Whatchamacallit Affectionately Pinned Somewhere"
Girl Scouts are known for swapping SWAPS. Troops would decide on a theme....then girls make a SWAP based on that theme....and then they are exchanged with other troops. There was a huge swapping area at the Washington Monument in NY when GS celebrated their 100th year. Girls swap at camp too....themes can be holidays, GS related, Juliet Low related, Food, Girls, Camping....just about anything!!
Kaitlyn has started swapping with troops/girls from different states/countries. Its very addicting....and exciting while your waiting to see what is coming to you. Kaitlyn has been stalking the mail box daily. Coby has even expressed interest in wanting to find a Cub Scout Pack to exchange with.....after all...swapping did start with Boy Scouts. BS would swap at camps or Pow Wows with councils.
Here are the swaps KK has been making.....
Girl Scouts are known for swapping SWAPS. Troops would decide on a theme....then girls make a SWAP based on that theme....and then they are exchanged with other troops. There was a huge swapping area at the Washington Monument in NY when GS celebrated their 100th year. Girls swap at camp too....themes can be holidays, GS related, Juliet Low related, Food, Girls, Camping....just about anything!!
Kaitlyn has started swapping with troops/girls from different states/countries. Its very addicting....and exciting while your waiting to see what is coming to you. Kaitlyn has been stalking the mail box daily. Coby has even expressed interest in wanting to find a Cub Scout Pack to exchange with.....after all...swapping did start with Boy Scouts. BS would swap at camps or Pow Wows with councils.
Here are the swaps KK has been making.....
Crawfish AKA 'Mud Bug'
Sleeping Bag Girls
Baked Potato
Alligators
Slushy (drink from Sonic)
Cub Scout Neckerchief Slides
I have been trying to incorporate a new neckerchief into our lessons with Cub Scouts. They are so easy to make and the boys love them. So far we have made a derby car, a s'more, and a camp fire. I plan on doing some holiday ones coming up...so keep a look out for those.
THE DERBY CAR
This neckerchief I made ahead of time for the boys to receive once they registered for our Pinewood Derby. This is molding bought from Lowes....then sanded down to remove one beveled edge. I painted them blue...added the Cub Scout Logo...and flat thumb tacks that were painted black for wheels. Once all dry....I hot glued a small piece of PVC pipe to the back. These were not hard to make...the time consuming part was the sanding and painting. If I could have found a piece of molding without the extra bevel....I wouldn't have had to sand hardly any ay all.
THE CAMP FIRE
I downloaded a camp fire template off the internet. It had 3 separate flames to create the fire. I opted to use only 2 since I was preparing kits for our district camping trip and 200 was a lot to do..... I traced each flame onto colored foam and cut out. I then used mini popsicle sticks and colored them brown with a marker. I use a fine tip sharpie to add detail such as knots and lines in the 'bark' on the 'logs'. To assemble...you just place the smaller flame on top of the larger one...and add your 'logs' crossing them like in a real fire. We use pipe cleaners for the back to attach them to the neckerchiefs. These were a big hit...even the girls made them and then used them in their hair for decoration.
THE S'MORE
We met a few weeks back to finish up our Summertime Activity Awards. The boys played Scout Bingo, made S'more Neckerchief Slides and ate S'more's on a Stick.
I precut the foam/felt ahead of time so the kids could focus on the assembly. I went with 2x2 squares to make them noticeable but not too big to wear. The light foam served as the graham cracker. The dark brown served as chocolate and the marshmellow was a cotton ball un-coiled. We then hot glued a piece of PVC pipe (or pipe cleaner) to the back.
THE DERBY CAR
This neckerchief I made ahead of time for the boys to receive once they registered for our Pinewood Derby. This is molding bought from Lowes....then sanded down to remove one beveled edge. I painted them blue...added the Cub Scout Logo...and flat thumb tacks that were painted black for wheels. Once all dry....I hot glued a small piece of PVC pipe to the back. These were not hard to make...the time consuming part was the sanding and painting. If I could have found a piece of molding without the extra bevel....I wouldn't have had to sand hardly any ay all.
THE CAMP FIRE
THE S'MORE
We met a few weeks back to finish up our Summertime Activity Awards. The boys played Scout Bingo, made S'more Neckerchief Slides and ate S'more's on a Stick.
I precut the foam/felt ahead of time so the kids could focus on the assembly. I went with 2x2 squares to make them noticeable but not too big to wear. The light foam served as the graham cracker. The dark brown served as chocolate and the marshmellow was a cotton ball un-coiled. We then hot glued a piece of PVC pipe (or pipe cleaner) to the back.
Monday, June 20, 2011
Flower Power Party
My daughter turned 9 over the weekend....and though she has lots of favorites...nothing really 'stands' out...except she is a 'girly girl'. So I went with a 'flower power' theme. We found these plates at Dollar Tree and she loved them.

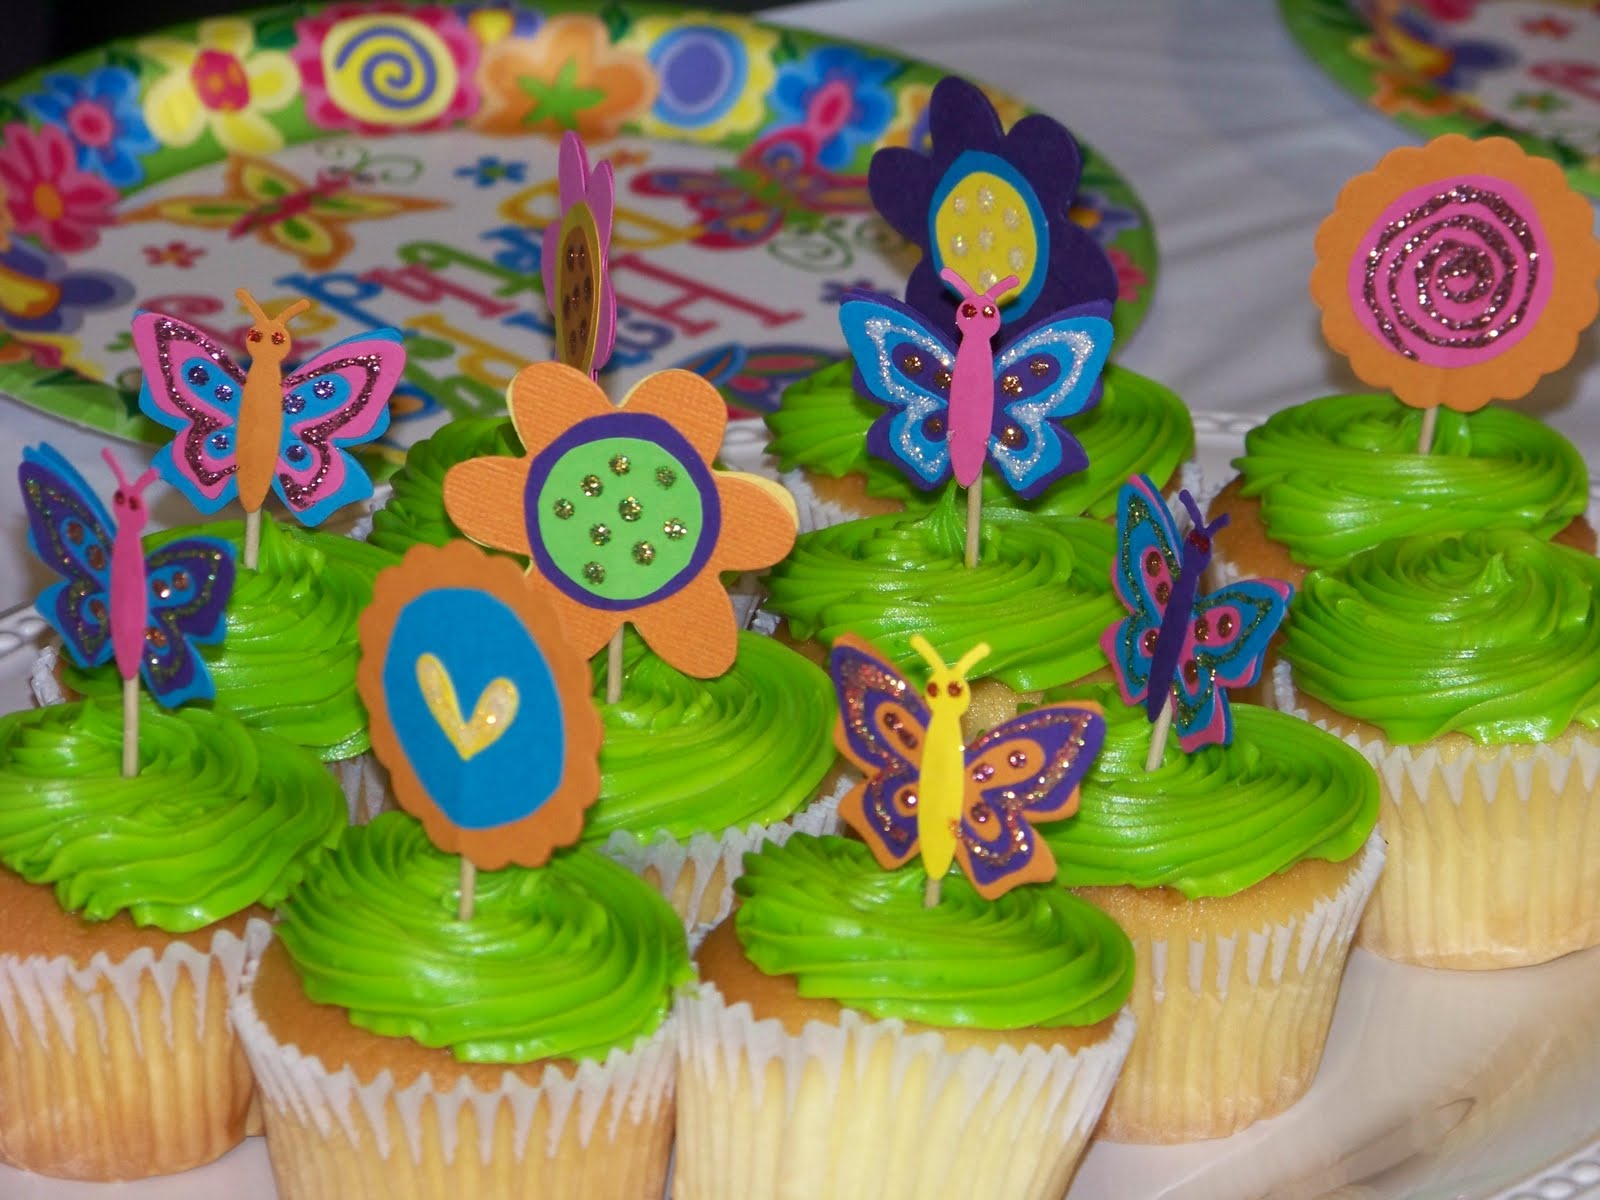
I hand cut out flowers to match the ones on the plates...and added stickles to make them shine...and used them as confetti on the table. The butterflies are made of fabric...and were in some craft containers my dad bought for me at a yard sale....I love it when I can re-purpose stuff!! I added stickles (glitter glue) to these as well...it really added a nice touch. (sorry about the colors...the lighting was off)

I went with cupcakes since we were having the party at a different location....and I had the bakery add lime green icing...and I made the picks for them. I used my Quickutz scrapbooking tool to cut out butterflies and flowers. I also added stickles to these for a glittered look.


Once back home I had several crafts for the kids to make that coordinated with the 'flower' theme....first was a door knob hanger for their rooms...I found these at Dollar Tree as well. I had assorted foam flower shapes and letters for them to use to decorate.(sorry no picture)
I also had a butterfly activity planned. You take 2 pieces of 4x4 tissue paper...and an old wooden clothes pin...not the ones with the springs. First you cut the edge of the paper in the shape of wings...(not the folded edge). You slowly feed the tissue paper up through the bottom...and secure with tape...add a pipe cleaner...and you have a beautiful butterfly to hang up.

It wasn't hard to come up with activities and crafts....and almost everything was a $1. If you did this with a younger bunch of girls...you could play 'Pin the Petal on the Flower'. Just cut out a large flower from poster board...and then a single petal to fit....the game would be played like 'Pin the Tail on the Donkey'. Another cute game could be 'Hot Flower'...played like 'Hot Potato'...you would play music while the kids passed around a flower...and the person holding the flower when the song stops...is out.
Since I was having girls and boys at the party...I went for 'generic' goodie bag items...and saved the girlie girl stuff for the slumber party. But for an all girl party...some great ideas are flower pens, flower notepads, flower hair accessories, flower stickers, they even have flower glow sticks at the Dollar Tree. (Can't you tell...I {heart} the DOLLAR TREE?)...It didn't take a lot of time or creativity to make this birthday a wonderful memory for my daughter!

I hand cut out flowers to match the ones on the plates...and added stickles to make them shine...and used them as confetti on the table. The butterflies are made of fabric...and were in some craft containers my dad bought for me at a yard sale....I love it when I can re-purpose stuff!! I added stickles (glitter glue) to these as well...it really added a nice touch. (sorry about the colors...the lighting was off)

I went with cupcakes since we were having the party at a different location....and I had the bakery add lime green icing...and I made the picks for them. I used my Quickutz scrapbooking tool to cut out butterflies and flowers. I also added stickles to these for a glittered look.


Once back home I had several crafts for the kids to make that coordinated with the 'flower' theme....first was a door knob hanger for their rooms...I found these at Dollar Tree as well. I had assorted foam flower shapes and letters for them to use to decorate.(sorry no picture)
I also had a butterfly activity planned. You take 2 pieces of 4x4 tissue paper...and an old wooden clothes pin...not the ones with the springs. First you cut the edge of the paper in the shape of wings...(not the folded edge). You slowly feed the tissue paper up through the bottom...and secure with tape...add a pipe cleaner...and you have a beautiful butterfly to hang up.

It wasn't hard to come up with activities and crafts....and almost everything was a $1. If you did this with a younger bunch of girls...you could play 'Pin the Petal on the Flower'. Just cut out a large flower from poster board...and then a single petal to fit....the game would be played like 'Pin the Tail on the Donkey'. Another cute game could be 'Hot Flower'...played like 'Hot Potato'...you would play music while the kids passed around a flower...and the person holding the flower when the song stops...is out.
Since I was having girls and boys at the party...I went for 'generic' goodie bag items...and saved the girlie girl stuff for the slumber party. But for an all girl party...some great ideas are flower pens, flower notepads, flower hair accessories, flower stickers, they even have flower glow sticks at the Dollar Tree. (Can't you tell...I {heart} the DOLLAR TREE?)...It didn't take a lot of time or creativity to make this birthday a wonderful memory for my daughter!
Monday, June 13, 2011
It's a Fishin' Party
My son turned 8 on May 5th..and since he had been really into Cub Scouts..and the great outdoors...he decided he wanted a fishing party. I had the party at the Children's Discovery Center.....and after the party each child was allowed to play all day.
His cake was bought at a local supermarket bakery. I really like the way it turned out...the 'water' on top is a 'gel'....it almost looks like the real thing.

His cake was bought at a local supermarket bakery. I really like the way it turned out...the 'water' on top is a 'gel'....it almost looks like the real thing.

I placed blue table cloths on the table to act as 'water'...and there were 'life savers' in the water.....just in case anyone fell in....

There were 2 'gold fish' bowls with gold fish in them for the kids to eat...this was a big hit.....some kids didn't want to stop eating gold fish to cut the cake.


There were 2 'gold fish' bowls with gold fish in them for the kids to eat...this was a big hit.....some kids didn't want to stop eating gold fish to cut the cake.

These are 'Buckets of Bait'...AKA: chocolate ice cream, chocolate oreos and gummy worms....the kids loved this...they kept saying that the worms were moving....LOL

Once the cake was cut and presents were opened...each guest took home a goodie bag filled with fun stuff. I found this fish printable online for free and added the 'Thank You'. I couldn't find my stapler so I used paper clips..and it worked out great because the fish are looking up at the 'hooks' like they are fixing to bite them....


Once the cake was cut and presents were opened...each guest took home a goodie bag filled with fun stuff. I found this fish printable online for free and added the 'Thank You'. I couldn't find my stapler so I used paper clips..and it worked out great because the fish are looking up at the 'hooks' like they are fixing to bite them....

Sunday, January 9, 2011
Valentine's Decorating from Dollar Tree

I decorated my mantel for Valentine's day....with items from the dollar tree. I used rose petals and heart garland found in their wedding section to scatter around. The glittered hearts are can be found in their Valentine gift section...that has the V-day pencils, erasers and such.....I just pulled them off the sticks and added them to the vase! The cones are left overs from Christmas....and are sitting on candle stands from the DT. The white roses are sold on a bush....I just pulled them apart to add to the bowl....which was bought at DT too! All candles and candle holders where bought there....I just re-use the holders each time and switch out the candles!! The wreath is one that I bought last year after Christmas...but still from DT!! I made the 'love' framed print from my scrapbooking supplies. Can't you tell...I just LOVE dollar tree for decorating??????????

Project Life Giveaway
Saturday, January 8, 2011
Window Clings on a Mirror
I love window clings. They are one of the simplest decorating elements there are. I picked up some recently and was thinking on what to do with them......then I got the idea to add them to the mirror in my guest bathroom!! TOTAL CUTENESS!!! I love the way this turned out!! I am already getting ideas about other holidays!!!
Friday, January 7, 2011
Heart Wreath
I love to think outside the box! I also love a good bargain!! I bought these red tinsel wreaths at Dollar Tree last year after Christmas. I never got around to using them....but I found them the other day while packing away Christmas. All I did...was bend the wire into the shape of a heart (easy to do)....and then hang it with ribbon.

I always look for red items after Christmas...and then incorporate them into Valentine's decorations or gifts. You usually have a GOOD selection to choose from...and can find them for just pennies!! I have several more wreaths...and can't wait to show you what I come up with!!!

I always look for red items after Christmas...and then incorporate them into Valentine's decorations or gifts. You usually have a GOOD selection to choose from...and can find them for just pennies!! I have several more wreaths...and can't wait to show you what I come up with!!!
Thursday, January 6, 2011
Decorating with Paper
Remember those plastic Sterlite containers/drawers....the cheap affordable storage. Yeah...we all use them...me probably in just about EVERY room in my house. But lets face it...they are not the prettiest to look at. When they are in my cabinet...I could care less...but in my scrapbook room....I want cuteness. So I have come up with a easy affordable way to turn them into matching decorative storage units......by using PAPER! Yep...thats right PAPER!
I also used paper to decorate my plastic paper holders that are made by Cropper Hopper. Using the same pattern paper I used on the memo board I cut it to fit the front. I then cut a black piece of cardstock about 1/2" less in width and attached it to the pattern paper....then just slip it into the font of the holder.
On my large rolling plastic storage I also cut paper to size on the sides that would be showing...and I rotated pattern with cardstock opposite of what was in the front of the drawer for contrast.

I measured the width and depth of the inside of the drawers...and cut a piece of black cardstock or a piece of pattern paper that I used on my memo board to that measurement. Each drawer has an indention at the front...and this will hold the paper...but if you rather...you can use double sided tape to hold it to the front securely.
I also used paper to decorate my plastic paper holders that are made by Cropper Hopper. Using the same pattern paper I used on the memo board I cut it to fit the front. I then cut a black piece of cardstock about 1/2" less in width and attached it to the pattern paper....then just slip it into the font of the holder.
On my large rolling plastic storage I also cut paper to size on the sides that would be showing...and I rotated pattern with cardstock opposite of what was in the front of the drawer for contrast.

It is a very simple decorating idea...but it does make a BIG difference in the overall look.
Wednesday, January 5, 2011
More Crayon Hearts
I couldnt sleep last night...so I was online checking out Valentine decorations and I ran across an idea on Martha Stewart. She has a demo about crayon hearts but her's are hung....so I decided to add some to my banner over the kitchen sink!! Look at the way the sun shines through the crayons......its so pretty IRL!! The kids keep asking which heart was made from their crayon paper.....LOL...they love seeing their work on display!!


Memo Board Re-Purposed
I have had this regular cork memo board now for 4 years....it was looong over due for a makeover. It was a very easy and fast project.....and I love the outcome!!
First I sanded the frame a little....it was raw wood...so it had some splinters. Next I just painted it black with acrylic paint that I had on hand. Finally I tacked scrapbook paper to the inside of the frame...it took 6 sheets to cover it...I just slipped each page behind the other. I used a busy print so it was easy to match the design...and in the areas I couldnt get it quit right...you still can't tell it. I used glue dots...so I could change out the paper if I decide to re-decorate. I had also bought wrapping paper to cover it....but seen this scrapbook paper and fell in love...I used the wrapping paper on another project! :) This was the result.......
I added the fluer de lis and the chipboard letter 'C' painted in hotpink to accent!

Up next....how to turn those blahhh sterlite plastic storage drawers into matching decorative pieces.
Sunday, January 2, 2011
'Love' is in the air......
Here is another little Valentine craft that we made yesterday. These pennants are made out of paper...but you could use fabric, plastic, chipboard, felt...or any other material you choose.

Here is a quick HOW-TO:
1. Cut your pennants to size (I just worked with mine till I liked it...no measuring here)...I used Hobby Lobby Cardstock
2. Add a strip of pattern paper to the top that is 1" wide by your pennant width + 1/4 inch so it hangs off the edges just slighty (all pattern paper that I used is KI Memories... I have had it FOREVER...so I don't know the collection)
3. Cut out 8 hearts in desired size...4 in pattern paper and 4 in a matching solid
4. Cut out the centers of the 4 solid colored hearts leaving only the outline (I used Bazzill Bling paper)
5. Last add your sentiment of choice....you could use 'Be Mine' -'Mi Amore'-I (heart) You...or anything fitting for the occassion! I used a Quickutz font called Yogurt to cut my title out of Doodlebug Sugar Coated cardstock.
The best part about this project is I used items I already had. Yep! Thats me being FRUGAL in 2011!! Stay tuned...because there are more 'LoVe' crafts coming!!
I am linking up with CraftOmaniac....come join the fun!!

Here is a quick HOW-TO:
1. Cut your pennants to size (I just worked with mine till I liked it...no measuring here)...I used Hobby Lobby Cardstock
2. Add a strip of pattern paper to the top that is 1" wide by your pennant width + 1/4 inch so it hangs off the edges just slighty (all pattern paper that I used is KI Memories... I have had it FOREVER...so I don't know the collection)
3. Cut out 8 hearts in desired size...4 in pattern paper and 4 in a matching solid
4. Cut out the centers of the 4 solid colored hearts leaving only the outline (I used Bazzill Bling paper)
5. Last add your sentiment of choice....you could use 'Be Mine' -'Mi Amore'-I (heart) You...or anything fitting for the occassion! I used a Quickutz font called Yogurt to cut my title out of Doodlebug Sugar Coated cardstock.
The best part about this project is I used items I already had. Yep! Thats me being FRUGAL in 2011!! Stay tuned...because there are more 'LoVe' crafts coming!!
I am linking up with CraftOmaniac....come join the fun!!
Crayon Hearts
Today the kids and I made Valentine decorations.This was really easy and fun to do....of course the kids lost interest the moment I told them 'I' would be doing the ironing....LOL
We used an iron to melt crayon shavings between 2 sheets of wax paper....and then I cut out hearts in different shapes...and strung them together to make a banner.

I used my Quickutz font Stardust to write 'Be Mine'....and then hung it in the kitchen window so the light could shine through it like a suncatcher!

Tips: Here are a few suggestions I learned through trial and error...
1. Lay down craft paper on your work surface...and use craft paper on top of the wax paper before ironing...kinda like a sandwhich.
2. If your wax paper starts to pull away from your crayons once you cut it...just place it back down..and melt the wax a little...it will reseal right up!
3. It is better to hand cut these instead of running them through a die-cutting machine....I found that the pressure really crushes the crayon into the wax paper...sometimes tearing it.
We used an iron to melt crayon shavings between 2 sheets of wax paper....and then I cut out hearts in different shapes...and strung them together to make a banner.

I used my Quickutz font Stardust to write 'Be Mine'....and then hung it in the kitchen window so the light could shine through it like a suncatcher!

Tips: Here are a few suggestions I learned through trial and error...
1. Lay down craft paper on your work surface...and use craft paper on top of the wax paper before ironing...kinda like a sandwhich.
2. If your wax paper starts to pull away from your crayons once you cut it...just place it back down..and melt the wax a little...it will reseal right up!
3. It is better to hand cut these instead of running them through a die-cutting machine....I found that the pressure really crushes the crayon into the wax paper...sometimes tearing it.
Friday, December 31, 2010
2010 Year in Review
Tomorrow brings a new year with a bunch of new projects....so here is a recap from 2010.
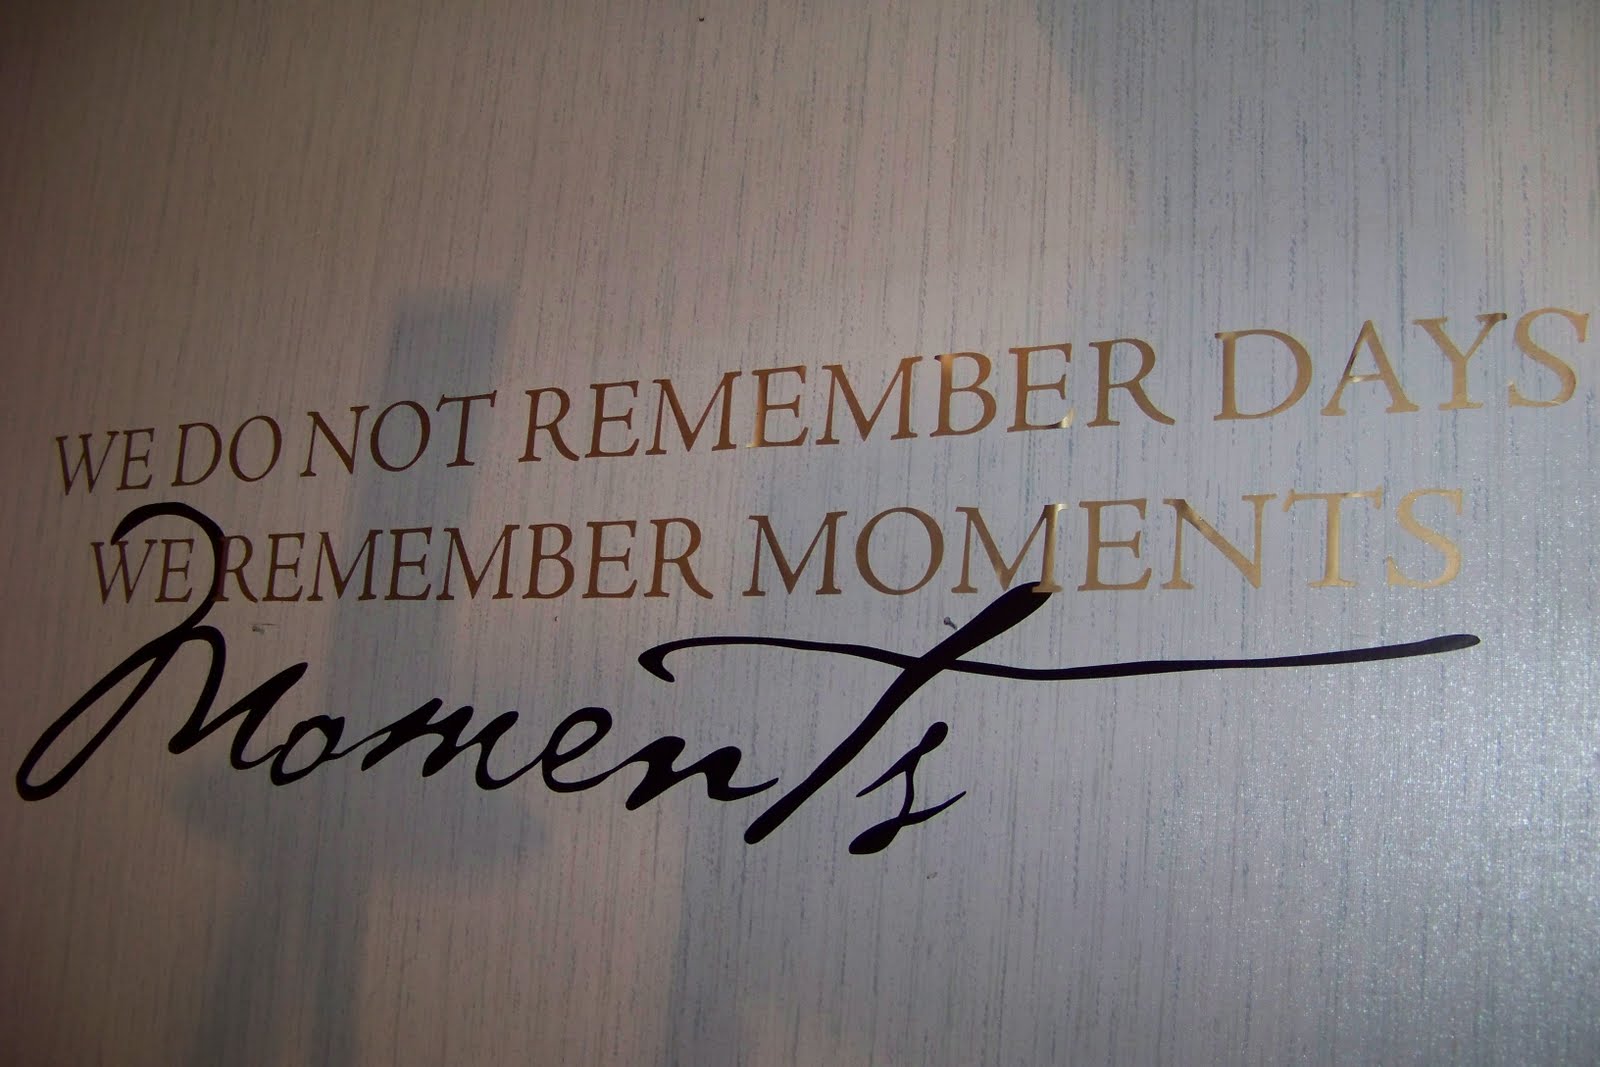
Vinyl wording on my dinning room wall

wood letters painted...then embellished with DT stickers


Used prints found online..and iron on printing paper...and made these
shirts for my kids to wear to school to show there support of
the Saints going to the SUPERBOWL-----GO SAINTS!!!

A little Christmas decorating.....
I found both glass containers at thrift stores....the green filler
is from HL...but DT carries it now...and those ornaments were
.25 cents at another thrift store

This is hanging from my dinning room light....DT reindeer
and snowflakes

We made these as presents for each student in my kid's classes
this year...instead of giving candy! They were a big hit...even the teachers
loved them!!


Vinyl wording on my dinning room wall

wood letters painted...then embellished with DT stickers


Used prints found online..and iron on printing paper...and made these
shirts for my kids to wear to school to show there support of
the Saints going to the SUPERBOWL-----GO SAINTS!!!
Chelsea turned 16....and she had a sweet 16 party....lots of candy
themed items....notice the candy bar...and giant lollipop?
I made these shirts for the girls to wear at the mall on their
scavenger hunt
I made the sunflower ground cover...and purple wreath for dad's grave
Pom Pom's....the new craze
Tissue paper flowers
Teacher gifts with school goodies
Large paper clips to hold together graded papers...used my QK to
cut out the circle and apple
Foam door hangers from the DT...and little bits and pieces from my
stash...and the kids made their teachers door hangers...
Kaitlyn's cheer birthday....the design was better in my head....the
pom-pom should have been smaller...and I think it would have looked better.
Fall decoration on the table
.....and on the mantel...all DT items....
White trash for a Halloween party...and a print out found online.....
I added candy corn and reece pieces for a festive touch
Halloween Treat Bag....
These are DT wedding party favor boxes...a little torn
paper and ink... and wiggly eyes...VERY EASY!!
Our advent countdown....the numbers are another free printable I
found online...each bag contains a little goodie...it was like opening presents
each day of the month...the kids LOVED it!!

A little Christmas decorating.....
I found both glass containers at thrift stores....the green filler
is from HL...but DT carries it now...and those ornaments were
.25 cents at another thrift store

This is hanging from my dinning room light....DT reindeer
and snowflakes

We made these as presents for each student in my kid's classes
this year...instead of giving candy! They were a big hit...even the teachers
loved them!!

Subscribe to:
Posts (Atom)

.jpg)
.jpg)
.jpg)
.jpg)
.jpg)
.jpg)